You’ve heard that switching to energy efficient lighting can save money, but where do you start?
Old 400W HID systems are installed almost everywhere in commercial lighting applications, including warehouses, parking lots, sports facilities, and many other places. With energy prices on the rise and bulbs that have an average of 460 watts each with a ballast, energy bills can be expensive. Let's take a look at using a metal halide retrofit kit to switch to LED or induction lighting.
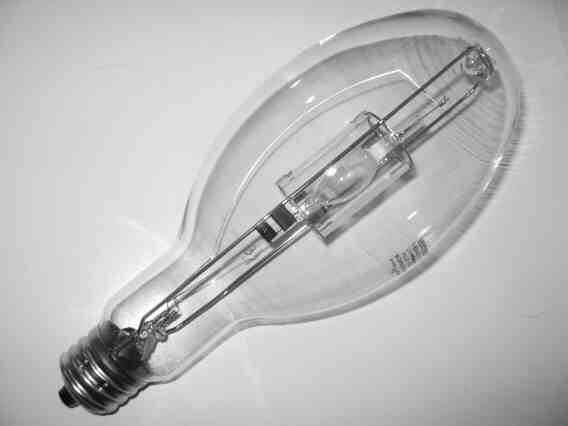
Metal Halide LampYou’ll be happy to know there are great solutions to save over 50 percent on energy and increase light levels/quality in the process, and we’ve written a guide to help you retrofit your existing 400 watt metal halide or high pressure sodium HID fixtures to LED in this comprehensive how-to-guide. Keep reading to find out how!
SOME THINGS TO CONSIDER FOR YOUR HID TO LED RETROFIT
Should you complete the installation yourself or hire a contractor?
Unless you choose a retrofit kit that doesn’t need a rewire, you will be working with high amounts of electricity. We always recommend you have a licensed professional perform electrical work.
If not now, when is the best timeframe?
We have been in lighting for years and there seems to be one constant: electricity prices continue to go up. Retrofits provide energy savings that have a huge return on investment so the sooner you can make the switch the better.
What are the retrofit options?
Retrofits usually fall into three main categories:
Screw in lamp with no rewire – Requires no rewiring and you just replace the lamp like normal. Works with the old existing HID ballast. Corn lamps are a great option for this method, learn more here.
Screw in lamp with rewire – Requires rewiring the power circuit directly to the lamp socket and removing the old HID ballast.
New fixture –Sometimes retrofit kits don’t fit or the existing fixture is just too old. In these scenarios, it makes sense to order a new fixture.
How much will it cost?Prices vary depending on factors such as quality, warranty, light output, and efficiency. The good news is that there are plenty of options to reach whatever goals you have for the space.
Are rebates available? If so, what are the requirements?Utility rebates can pay for a considerable amount of the project cost with energy efficient lighting. Always speak with your local utility company about potential rebates before the project starts, because some require pre-approval before installation. Learn more about rebates here.
A LITTLE BACKGROUND ON THE DIFFERENCES BETWEEN HID AND LED
The existing 400 watt HID lighting system consists of a 400 Watt high intensity discharge (HID) lamp and external ballast, in addition to the fixture housing. The total system wattage draw including the ballast is closer to 458 watts per fixture.
HID lamps include metal halide, mercury vapor and high pressure sodium. 400 Watt HID lamps are commonly found in interior high bay/warehouse lighting applications, as well as exterior wall packs, canopy fixtures and pole mounted shoebox fixtures, usually mounted anywhere between 18 and 30 feet . If the existing fixture housings are in good shape, a retrofit lamp or module can be an economical option over a fixture replacement.
An LED replacement for the 400W HID system can range between 100-200 watts and save as much as 75 percent on energy consumption.
A wattage guideline for replacing HID with LED is to divide by four. In general, equivalent light output will be delivered by an LED option that is roughly a quarter of the wattage of the HID.
Solid state/LED lighting technology is distinctly different than gas-discharge/HID lamps. Fewer LED watts and lumens can accomplish equivalent light levels when comparing HID to LED. Many of the 400 watt HID equivalent products are 100-200 watt LED ranging 10,000-20,000 lumens - depending on the product. As LED technology keeps improving, the efficacy (lumens per watt) of LED lighting products increase over time.
Step 1: Verify you have a 400 Watt HID System
The bulbs are pretty big and there are two sizes. The first is the ED37 size, which is about 11-12” long. The second is a smaller case size called a BT28 which is about 8-9” long. Part numbers are usually stamped on the bulbs and will have the “400” number in it, which indicates the wattage. If your bulb fits these characteristics, you have a 400W HID system.
Also be sure to verify the voltage going into the fixture. The LED kits in new fixtures usually operate between 120-277V (multivolt). If you have a 347V or 480V system, you will need some step down transformers so it lowers the voltage to accommodate the LED driver.
Step 2: Define your goals
Energy Savings
LED kits currently use between 100 and 200 watts of power, producing between 55% and 80% energy savings vs. existing systems. Typically the higher the wattage, the brighter the bulb.
Increase in light levels (brightness)
Regardless of how the space was originally designed, you may want to decrease the brightness to save energy or increase it depending on what you are doing in the space. Usually you can decrease brightness for storage or warehouse use and will need to increase light levels for areas like car repair shops, manufacturing, showrooms, and sports lighting.
Increase in light quality - CRI(Color Rendering Index)/bringing out the colors on the ground
LED will bring a really nice increase to the light quality, regardless of what kit you choose. This is because the CRI (color rendering index) is higher and the LED technology looks like more of a pure/sunshine light source to the human eye than old HID sources.
Eliminate lighting maintenance costs
Good quality kits have a 3-5 year warranty with a rated life of 30,000-50,000+ hours, which translates to about 10-20 years at 8 hours a day.
There is a lot to consider and you can get a photometric layout if necessary. Our company provides one, as do many lighting manufacturers. If you need one to ensure the proper solution feel free to contact us.
Step 3: Measure Your HID Fixture
Be sure to measure the length, width, and height available in your fixture and write down the dimensions. Our kits are fairly compact, but sometimes the fixture design will not allow for a larger LED bulb to fit inside. Usually we can find a kit that works, but if nothing fits then you will need a new LED fixture instead.
A note about reflectors in halide fixtures – Some LED kits have a 360 degree diode design, which emits light everywhere and is made to use the existing fixture reflector. Some other kits have a “pancake” type design with the diodes on a flat surface. These types of kits allow you to take out the reflector if it gets in the way or if you aren’t bouncing any light off of it.
Each type can be advantageous depending on what fixture you have. If you are sending light straight at a target like the flat/pancake board design, this will be more efficient than the one that uses the reflector.
Step 4: Know The LED Retrofit Kit Types
LED Kit Shapes
LED Retrofit Kits – Typically an LED module with an external separate driver installs where the existing HID ballast is located in the fixture. The LED module is a disk or paddle shape with LEDs mounted on the same horizontal surface directing light downward and outward from the unit. Mounting hardware may include an E39 mogul base bracket to make use of the existing socket for easy installation.
New Fixture (LED or Linear Fluorescent) – Whether it's an interior or exterior application, a wide variety of whole fixture options exist for replacing a 400W HID fixtures. LED, T8 or T5HO linear fluorescent high bay fixtures are common solutions for replacing HID.
LED “Corn” Lamps – These screw-based LED lamps resemble a cob of corn with rows of LED lights providing 360 degree light output. Corn lamps come in a variety of wattages and color temperatures. Some are internally driven and others require an external driver.
LED Kit Wiring & Installation Types
Ballast Bypass – For LED lamps with internal drivers. LED products that are internally driven have the LED driver mounted inside of the base of the lamp. This means that any existing ballast should be bypassed/removed and power should be wired directly to the socket.
Plug and Play – For ballast compatible products. Ballast ready or ballast compatible LED products are designed to work with existing HID ballasts. In many cases it is the easiest retrofit because no rewiring is required. Double check that your existing HID ballasts are in good, working condition.
External Driver – Some LED products require an external driver. Installing an LED retrofit kit with external driver involves replacing the existing HID ballast with the LED driver and existing lamp with an LED lamp or module. Click here to shop Drivers.
Step 5: Choose a Metal Halide Retrofit Kit
Here are a few of our favorite and most popular kits that work with most applications:
3BL Corn Lamps - This Colorado company embraces a triple bottom line philosophy, valuing the planet and their employees just as much as their profits.
Step 6: Purchase & Install Your New Lighting Equipment
If completing a metal halide retrofit yourself, always refer to the detailed installation instructions provided for the specific products.
For hard-to-reach high ceiling retrofits, you may need to rent a lift. In some cases, ordering a sample product first will provide the chance to test the installation procedure and make sure the product meets your expectations.
There's much more to consider in a good lighting design or redesign including optic pattern/distribution, color temperature, CRI, warranty and rated life of the product. Our goal is to help you determine the best solution for your specific application. Our expert staff is available to discuss your project in detail and provide product recommendations. Let us know if you have questions. We’ve also included a couple of examples below!
EXAMPLE LED Retrofit 1: Auto Repair Shop
Greg has been running his own auto repair shop since his father handed down the business to him. The building is 25 years old. The cost of electricity is increasing with time and so are the utility bills. Business is steady, but it’s time to re-evaluate operating expenses.
The lights in the main shop are the original 400W metal halide high bay fixtures mounted about 20 feet in the air. Lamps need to be replaced often and ballasts continue to fail, requiring a lot of time and maintenance. In addition, Greg will have to rent a lift costing hundreds per day to switch them out. Finding time for building maintenance can be difficult.
A lighting retrofit can solve several of these problems. Investing in a metal halide retrofit will result in a reduction in utility cost and maintenance. It will also improve the quality of your lighting. The 400 watt HID high bays are the best place to start. They consume the most wattage and have the longest runtime. Updating the 400 watt fixture with an LED retrofit kit can save more than 60 percent of the energy and approximately $100 per fixture annually (based on $0.11/kWh electricity rate and run time of 60 hours per week).
EXAMPLE LED Retrofit 2: Parking Lot
Another way to look at it includes your 10 year return on investment. A retail store has a parking lot of 400 watt metal halide light fixtures – 25 of them. At an average of 12 cents per kWh in electricity cost and daily run times of 12 hours per day (average night time use over the course of the year), the total energy cost to run these each year is $6,018.12 (omitting demand charges and other energy cost variables for the sake of the example).
The calculation for that is as follows:
458 watts used per hour (total with HID lamp and ballast) x 25 fixtures = 11,450 watts/hour
11,450 watts X 12 hours per day X 365 days per year X 0.12 kWh rate = $6,018.22 yearly cost.
The fixture costs $348.75 currently, so the initial investment is $8,718.75. When you add in labor or retrofit installation costs, the total comes out to around $10,000.
So with your initial investment of $10,000, you are now saving $4,769.82 per year. After 10 years, that amounts to $47,698.20 in savings (not including additional maintenance savings or savings from electric rate increases that you now are not paying for).
After taking out the initial investment, you now have $37,698.20 after 10 years. This equates to a 14.19 percent annual growth rate on your initial investment. That is an amazing risk-free return for any investment.


